
In my last post I talked about zooming into and cropping an entire video clip in iMovie and Final Cut Pro X (FCPX). Another approach to this is to use zoom as an effect to “crop” into your image while panning in your video clip, an effect if not originated at least made very famous by Ken Burns. In both iMovie and FCPX there is a function to do just this, appropriately named the Ken Burns Effect. This will let you create an animated pan (the effect of motion within a video clip) to a crop that has a smooth flow from one section of your video to another.
Video is shot in frames, and each frame is a picture still. Most U.S. made movies are shot at 24-30 frames per second (fps), but directors like Peter Jackson are just beginning to shoot at 48fps. There is debate as to the merit and need for this level of resolution (similar to the sample rate fidelity debate- 44.1khz compared to 96khz in audio sampling), but that is beyond the scope of this blog. The human eyes starts seeing motion somewhere between 16-20 fps. Early black and white films were at these frame rates.
To make any kind of animated transition within a video clip your software needs to “key in” on the starting and ending frames to demarcate them. This is called “keyframing” and effectively creates a meta marker embedded into your video clip as a reference point. iMovie and FCPX apply an algorithm that makes this transition from the beginning keyframe to the end very smooth. In iMovie your only choice is the Ken Burns effect. iMovie does all the keyframing in the background for you. In FCPX you can also use the Ken Burns effect but you have the added ability to do this manually, and add your own keyframes through the use of the transform tool. FCPX offers many parameters to adjust for the the transformation and manipulation of your video clip besides just scaling between your keyframes. For this post and tutorial I will focus on the Ken Burns effect in both programs.
How to pan and zoom in iMovie
Step 1: Crop tool and the Ken Burns effect
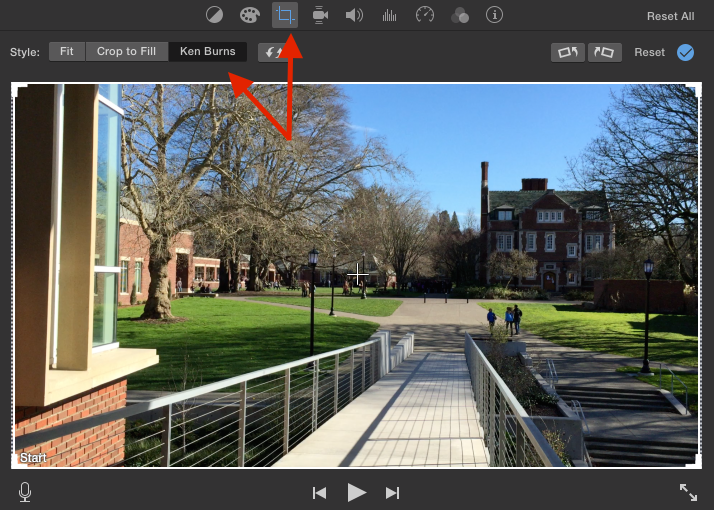
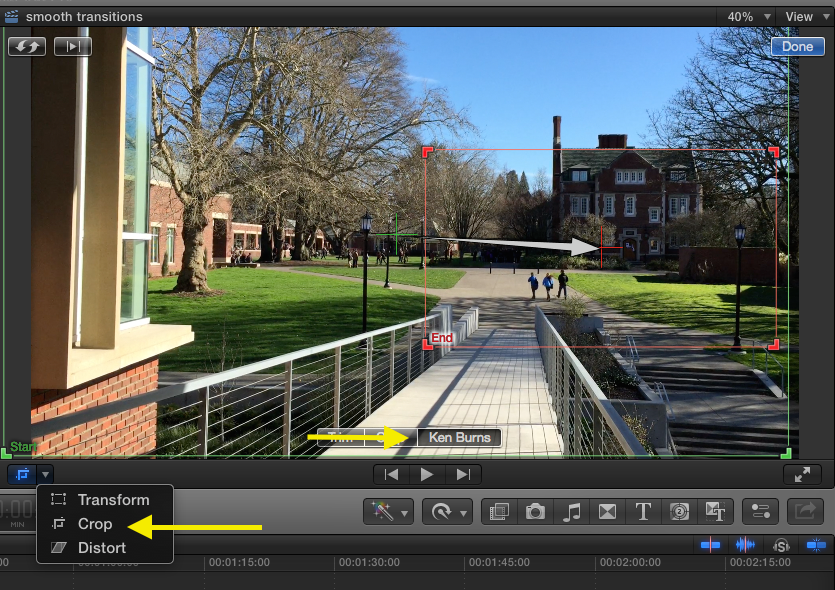
First, select the crop tool and the “Ken Burns” effect, as shown below.
Step 2: Understanding the terrain of the Ken Burns effect.
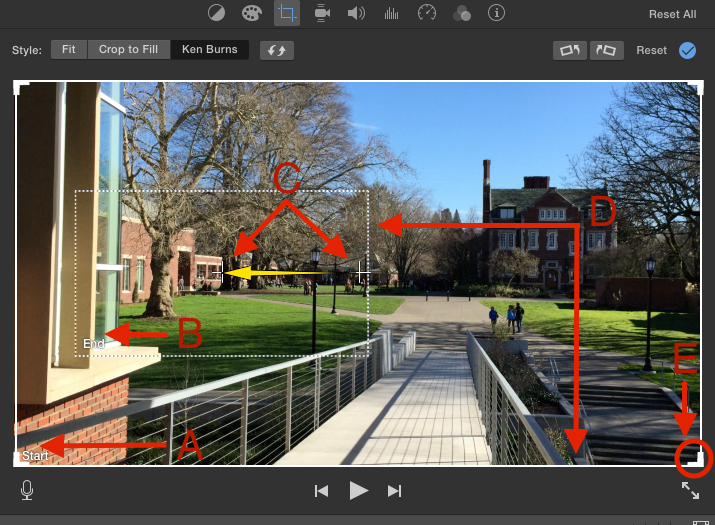
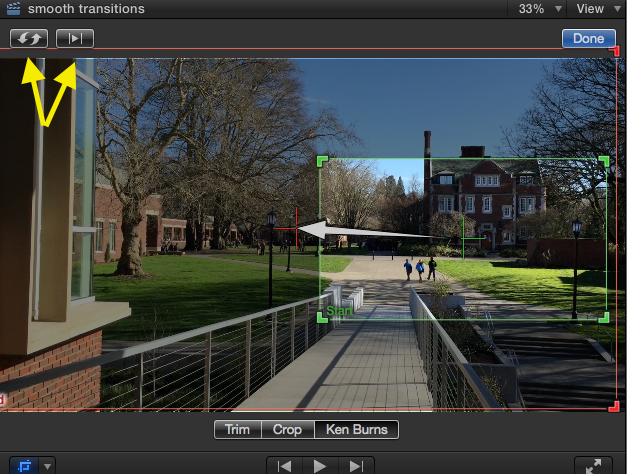
In this step I will explain five aspects of the Ken Burns effect that are essential to understanding how to use it. They are broken down and labeled A-E in the screenshot below: (A) the “Start” keyframe, (B) the “End” keyframe, (C) the center crosshairs for the start and end-along with the trajectory (yellow arrow) that your animation moves as it transitions between those two crosshairs, (D) the border of the active or selected frame is in bold; the inactive frame is dotted, (E) handles that allow you to resize the selected frame while maintaining the aspect ratio, (as referred to in my previous blog).
Step 3: End frame selected
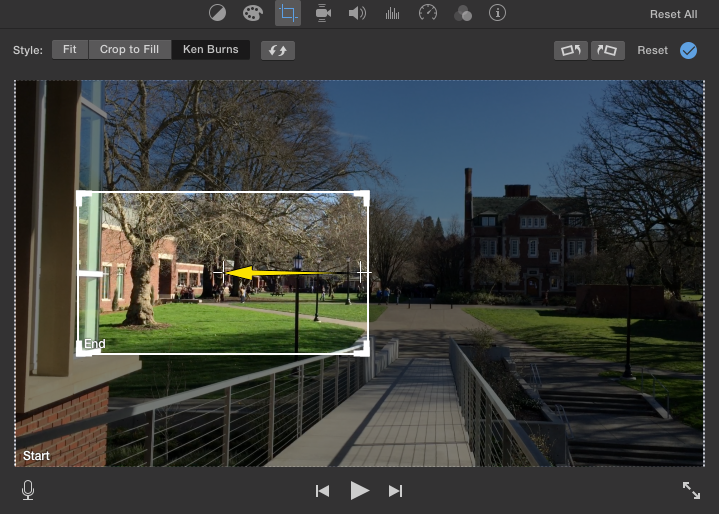
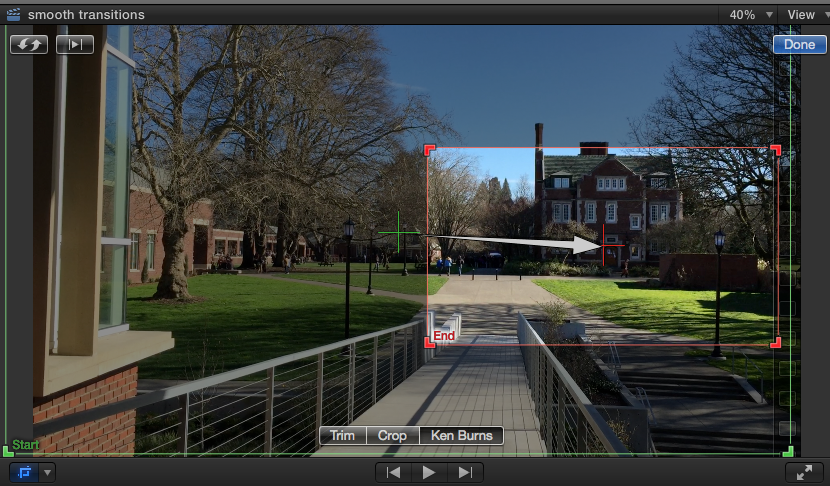
Move the end frame to where you would like it to be and adjust its size to the desired area you want to crop to. The crop will fill your viewfinder when done. Here is how the view looks when you select the “End” frame, notice everything is dimmed but the selected frame (this occurs only when the selected frame is the smaller frame). Whichever frame is selected is the one that you can resize and slide around your viewfinder.
Step 4: Press the Crop icon again to finish and play your video
Below is a video of the final pan to zoom based on the above examples.
That concludes a pan from a full shot to a cropped shot. You can also invert this, and start with cropped frames and end with a full frame. Below are the steps for starting with a cropped frame and ending with a full frame.
Step 1: Starting close (zoomed) and moving out using Ken Burns
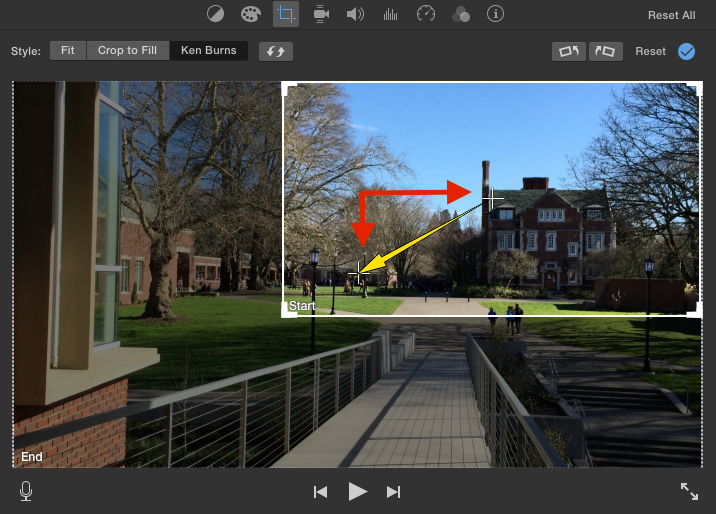
This time you’ll diminish the size of your “Start” frame to crop into an area. Define your crop area as with step on above. In the example below notice the center point of the “Start” frame and the center frame of the “End” frame and the yellow arrow showing the movement trajectory of the pan. For this example we are filling the view screen with the “End” frame.
Step 2: Choose the Crop icon to finish and play video
Below is a video of the inverted pan to zoom sequence.
That concludes a crop in to out pan in iMovie.
iMovie is a consumer grade program, so the choices are not as robust as in FCPX. For many things though, this software is perfectly adequate and features less of a learning curve than FCPX.
Using FCPX for Pan/Zoom
The main difference between the pan/zoom effect in iMovie and FCPX is the ability to preview and switch your start and end frames. You also have the ability to see and tweak the keyframes on a granular level if you wanted to.
Step 1: Crop and Ken Burns effect
The “Start” and “End” frames are both color-coded in FCPX. Choose “Crop” from the dropdown and then “Ken Burns” in the view screen amongst the three selections.
Step 2: Resizing your crop frame
Choose “End” and resize and move the frame to where you would like it.
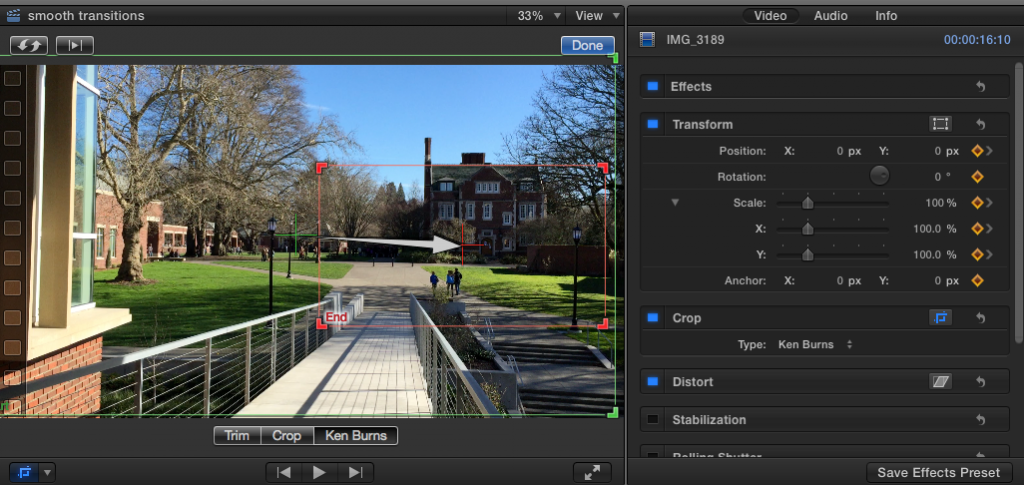
Example: Parameters – Start
Here is the view of the “Start” frame with the parameters revealed. Here you can see the keyframes in orange.
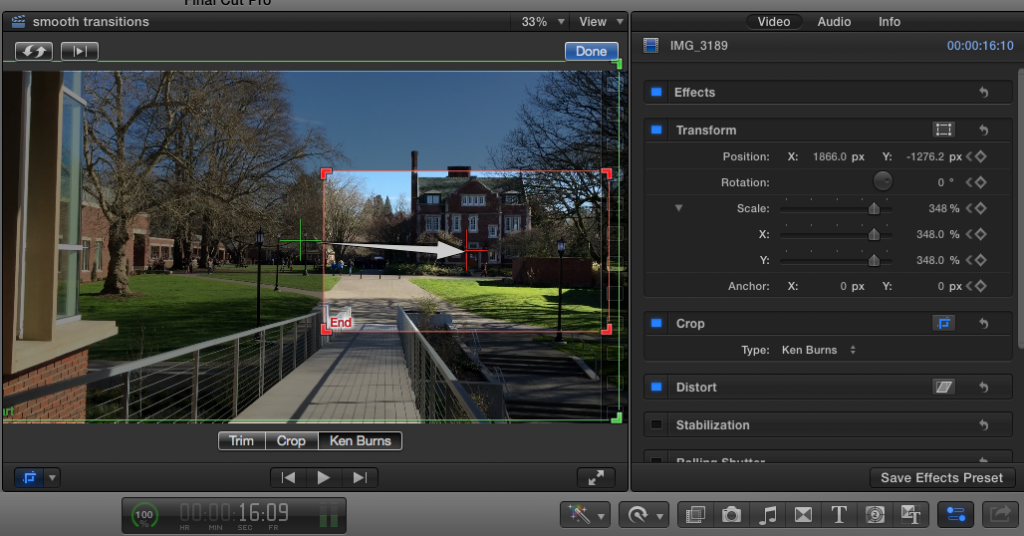
Example: Parameters – End
Here is the view of the “End” frame with the parameters revealed and the ending keyframes.
Step 4: Inverting Start and End frames in FCPX
You can easily switch your “End” and “Start” frames by using the switch button. You can also preview your switch by using the play button.
Both of these pieces of software are available at the PARC; iMovie is available in all the Mac labs on campus.
Have a great summer.
Joe