
This technique can be helpful when needing to record a video of your screen for educational purposes when media is being played back on a browser.
To record your Mac’s Screen with both audio and video:
- Install loopback audio (free extension).
- Open the media you want to screen capture in your application (if it’s a browser, use Firefox or Chrome, not Safari). Start at least 5 seconds before where you want to start – this will usually give time for the application to hide any playback controls which might be distracting. Don’t press play yet.
- Go to System Preferences/Sound. In the sound Output, choose Loopback Audio in the Output tab.

At this point, you will hear no sound from any of your Mac’s applications, but don’t worry. - Go to the QuickTime Player application; choose File/New Screen Recording.

- Choose if you want to record all your screen, or a portion of your screen (highlighted in red below), then click on the Record button.

- Click on the Options menu.

Choose the appropriate audio source, in this case Loopback Audio.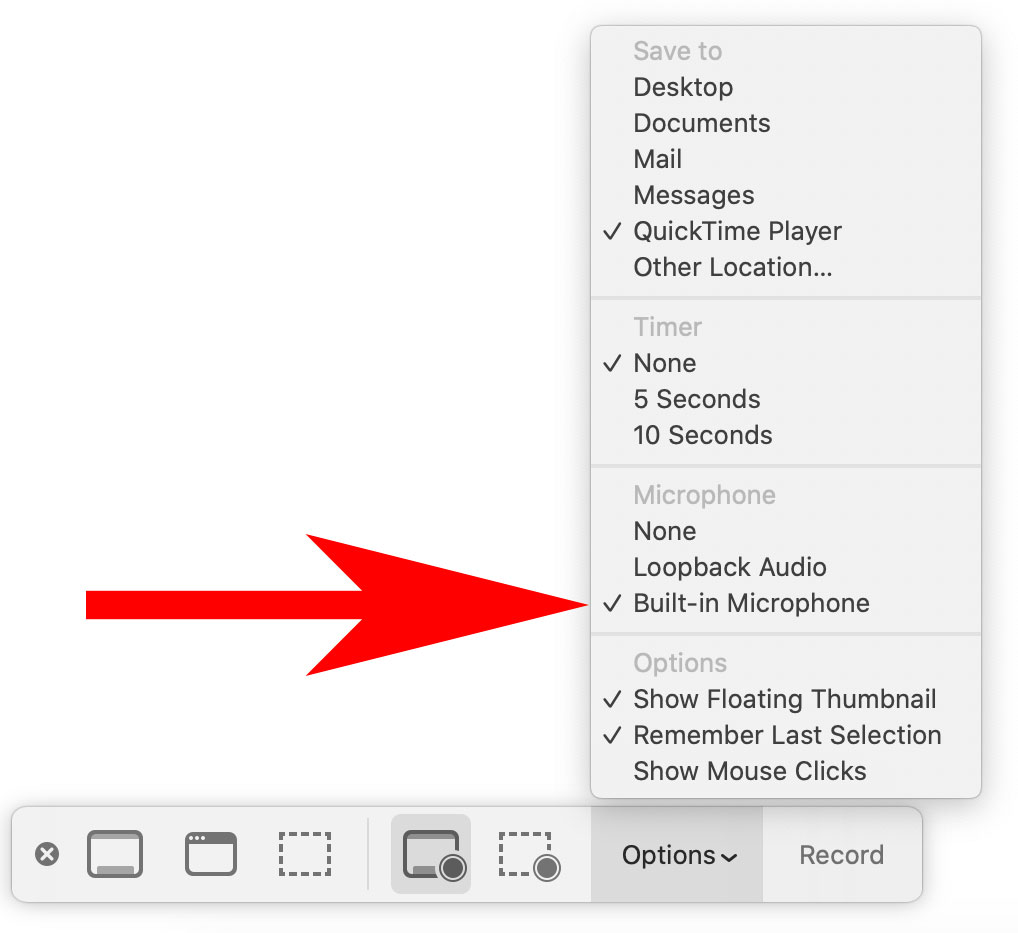
- Go to the application that was set to play the video; press play (hopefully you queued up the video to play at least 5 seconds before the area you wanted to capture – this will usually give time for the application to hide any playback controls which might be distracting).

After you’re done recording:
- Stop the video in your application that was playing your video.
- At the top of your screen (to the right of Finder menu items), click on the black square, which is the button to stop the Quicktime recording.
Save your video file. - Go to System Preferences/Sound. In the sound Output, change the preference back to Internal Speakers (or whatever was your original choice). You should be able to hear sounds now from your speakers.
- Go to your saved movie in QuickTime Player, and test out the sound. Trim the clip either in QuickTime Player or iMovie.