A classics professor was retiring from Reed College, and as a parting gift, a bust of Homer (one of his favorite Greek poets) was to be made at the Digital Fabs, a space located in the Reed physics building with 3d printing capabilities. After consulting with the classics department, I planned on finding a 3d model of Homer, then I wanted to alter the model, adding an engraving with Greek text of the Iliad to the base.
There were a few phases to the project:
- Research online. Find a 3d bust of Homer.
- Investigate 3d modeling software. Choose the right software that could modify a pre-existing 3d object.
- Print the new object with one of the 3d printers in the Digital Fabs lab.
Phase 1: Find a 3d bust of Homer
1.1 Online resource for 3d modeling software

Doing a quick search at Thingiverse (a great space for finding 3d files ready to print) turned up several busts; however, I found that searching solely for “Homer” was perhaps not the best search term, due to a certain character in the Simpsons! Luckily, there was also 3D project files for the greek poet bust that looked promising.
1.2 Testing a print
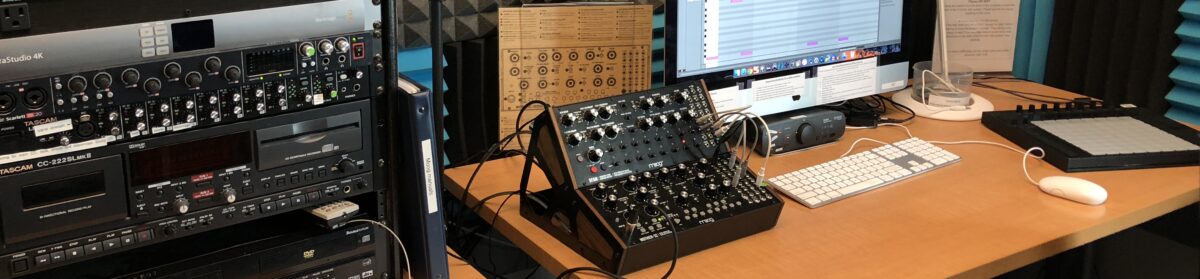
The Digital Fabs lab has two 3d printers, an Ultimaker 3 Extended and a Makerbot Replicator 5th Generation. A smaller test print was made using the Makerbot to see if there were any issues with the model; the result was great.
Some tips when considering objects for printing (especially in Thingiverse):
- Read the entire project writeup, and see if the files provided are the final print files – sometimes they are a subset of the project, or are only sample files that aren’t a complete set of the project.
- Examine the pictures to see if the project has been printed without issues; some models definitely are beta projects.
- Look at the number of downloads and and maker comments – often times you can find good suggestions on possible print settings to modify, or find out that there were print issues that have occurred with other users.
Phase 2: Software and altering the bust
Although the bust model turned out great, I wanted to modify it. First I wanted to crop a portion of the bust, then I wanted to add a rectangular base, and add a few lines of Greek text from the Iliad. But first, I had to select the 3d modeling software that would allow us to to do this.
2.1 Choosing the 3d modeling software
There’s a variety of 3d modeling software available. I chose to use AutodeskFusion 360, a CAD (computer aided drawing) program that is great for creating 3d objects. It can also import existing 3d models, make animations, test out 3D parts interactively, and more. It also has extensive help tutorials for beginners and advanced users, as well as a good support community.
2.1.1 Learning Fusion 360
There’s loads of tools packed into Fusion 360, and understanding the software interface is essential. To get started, I needed to get an overview of the Fusion interface:

- Data Panel. This is where all your projects are stored.
- Navigation bar. This includes both the modeling workspace, as well as the tools associated with each workspace.
- Workspaces. Part of the navigation bar; you can choose from a variety of workspaces such as patch, model, render, simulation, animation, CAM, mesh, and more. I worked usually in the Model and Mesh workspaces to perform the tasks needed for this project. Quick note: As you switch workspaces, your tools may change.
- Tools. Sketch, create, modify, assemble, construct, inspect, insert, make, select, and more.
- Viewcube. This allows you to quickly move the viewpoint to the top, front, right, etc, of your 3d space.
- Toolbar. This is where you can fine-tune your 3d space beyond the viewcube’s choices; you can orbit, pan, zoom, or fit your model on the screen.
Tips and things to know about Fusion 360
- Keyboard shortcuts. There are a number of Fusion 360 keyboard shortcuts that are too numerous to mention here, but are essential to learn if you want to work efficiently; shortcuts are included for scroll mouses, Mac touchpads and Magic Mouses, among other things.
- Cloud storage of all project files. Data is stored on the cloud – you login and upload files, then work on those files on the cloud. However, you can work offline; any changes will then be uploaded when you have an online connection. Additionally, you can store a copy on your local drive.
- Collaboration. You can also share and collaborate on projects.
- Name your layers. As your project fils may be grow with multiple objects in one project, be sure to rename your objects into a useful name, especially if you upload a file that has a non-recognizable name such as this one below.
2.2 Modifying the original artwork
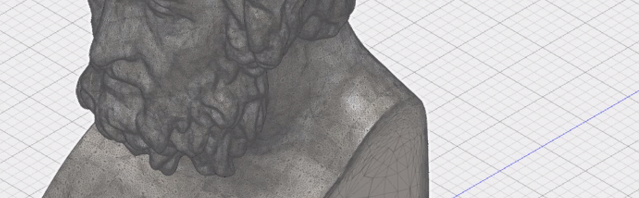
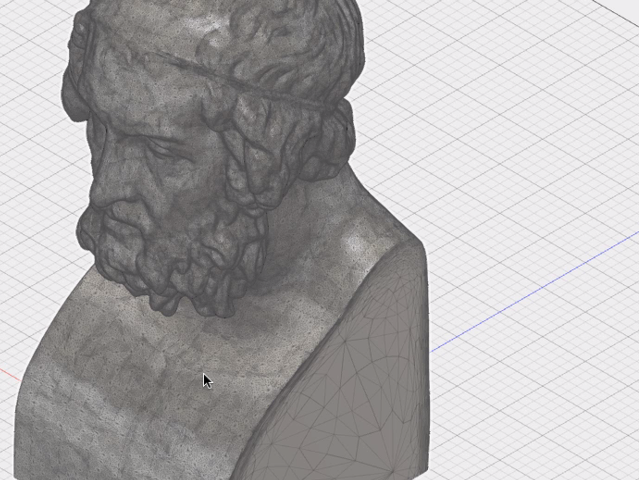
The original bust had a large base that went almost down to the chest; I wanted to crop a portion of the bottom out, then replace it with a base created in Fusion 360.
Fusion 360 can import existing .obj or .stl files, which are the common filetypes you would download from thingiverse. These filetypes are sometimes referred to as mesh files. Mesh files represent 3d objects with a cluster of connected shapes; they can be triangles, quadrilaterals, or any number of polygon or curved shapes, sometimes numbering in the thousands, depending on how complex the model is. Our particular model was an .obj file, and had thousands of shapes, or facets.

To work on modifying the mesh files, I had to create a Mesh workspace in Fusion 360. To do so, I had to go to Preferences/Preview/ and turn on the Mesh Workspace.
Then, I uploaded the mesh object into Fusion 360.
Afterwards, I needed to crop the object. As it was a straightforward crop to remove a portion of the base, the Plane Cut tool was used to crop our 3d object.
Next, I switched to the Create workspace and drew a rectangular base, then aligned it underneath the existing bust artwork, then adjusted the rectangular base to a height where the Greek text could be placed.
2.3 Import the Greek text
To create the first two lines of the Iliad, a classics professor provided a pdf of the text in a Greek font. I opened the pdf into Adobe Illustrator, converted the text to outlines, then exported it into a file format that Fusion accepted. In this case, I exported an .svg (scalable vector graphic) file.
I had to extrude the text, to turn the 2d text into a 3d shape. To do this, I selected the object, chose the Extrude tool (“e” is the shortcut for extrude) and extruded the text a slight amount, which created several new 3D objects in Fusion 360’s browser area.
However, there were a few issues with the outlined text not properly extruding. The animation below shows the selection and extrusion of the letter “o”, and shows how some of the text wasn’t properly knocked out – there should have been a hole in the cylinder, not a solid cylinder. The inside circle had to be deselected to extrude the hole in the cylinder.
Additionally there were gaps in some of the outlined texts; one of the issues was a comma shape not forming a complete object (which would be indicated by a shaped of yellow, as opposed to a green line with a gap). The artwork had to be modified to connect the lines. After this was done, the shape could be properly extruded.
Finally, all of the outlined text shapes was selected and extruded the same amount.
2.4 Merge the Greek text (and base) to the bust
I tested out a few small files to see what it would look like with the text extruding out from the rectangular base, as well as text that was engraved into the base; I ultimately decided to have the text engraved into the rectangular base. After the text was positioned, the next step was to export the design for the 3D printer.
2.5 Exporting the image
The original bust and the new base were two different objects; unfortunately choosing Export from the Fusion 360 menu resulted in only one object being exported. Apparently these two dissimilar objects needed to be converted to the same format before the export process. This conversion process is usually easy to do, but our particular shape had too many geometric shapes to convert in Fusion.
I found one way to convert the two dissimilar objects was through Fusion’s online conversion process. To do this process, I had to log in at MyHub.Autodesk360.com, select the project to export, then export it as an .stl file.
Starting off the process was straightforward, and the exporting process was done in the cloud. When it was done, Fusion sent an email message to download the completed exported file.
Phase 3: Printing the artwork
Importing the exported .stl file from Fusion into the 3d slicing software, which prepares the artwork for the 3d printer, was straightforward, but there was more to be learned about the technical aspects of 3d printing.
3-D Printing technologies
Currently there are over a half dozen technologies that 3d printer machines use to print shapes; each printer only does one particular technique. The two 3d printers in the FabLab make their prints by using a technology called Fused Deposition Modeling, or FDM, which is one of the least-expensive ways to do 3d printing. Essentially FDM works like a glue gun – it heats up a plastic material, then extrudes it onto a print bed. Objects are built with a thin layer of material at a time, from the base upwards; the layers can be as thin as a piece of paper, but it depends on the material being used. This process of layering is repeated over and over; objects can take anywhere from 1 hours to several days to build, depending on the size and complexity of the object.
3d design limitations
As an object is slowly printed from the base up, sometimes a layer has an overhang where no material exists beneath it; think of trying to print a house from the bottom up, with roof eaves overhanging a building. If the 3D printer tries to print a new layer with nothing below it, this new overhanging layer would begin to sag due to its weight before the substrate hardens; the sag depends on the angle as well as the distance from the base, but that’s for another discussion.
To prevent this sagging issue, the 3d printing software builds temporary supports underneath the final object to help prop up the overhanging layers; these supports then are removed carefully with a file or other sharp instrument after the print job is done, then possibly sanded down for a smoother finish. A lot of supports on a 3d object will cause a lot of post-printing clean up, so choosing how to print a model with minimal supports is ideal, to both save material as well as reduce the post-printing clean up.
3d printer choices

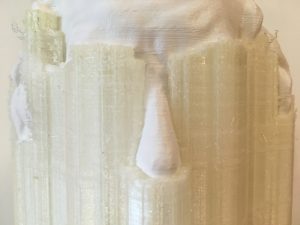
I chose to print on the Ultimaker 3; its print speed was faster than the Makerbot, plus it has a few extra features than the Makerbot. For one, you can print with two different print materials, which can be separate colors of FDM (the plastic material that builds the 3d models), or, for this case, you can print with two different materials, one that uses FDM for the final model, while another can be a water-soluble material that can be used for support (PVA, aka polyvinyl alcohol). After printing, the model can be soaked in warm water, which dissolves the PVA.
Below is an example of the model before it was soaked in warm water; the PVA support material is a cream color, while the final model is white . Imagine trying to cut away the support material – that would have been many hours of cutting away!
After soaking in warm water, you can see how the dissolvable material is mostly gone.

After a bit more soaking, the final project was cleaned up, and the retiring professor had a Homer bust, among other parting gifts.