
This page has several tips and tricks on how to record yourself for videos you produce.
Tag: video production
Recording yourself with Quicktime
If you are on a mac, you can use quicktime to record yourself for a video lecture. View instructions how to record yourself with Quicktime.
Recording yourself with Quicktime and Powerpoint
If you are on a mac, you can use quicktime to record a video lecture presenting. View how to record yourself with quicktime and powerpoint.
Trim a QuickTime Video Clip
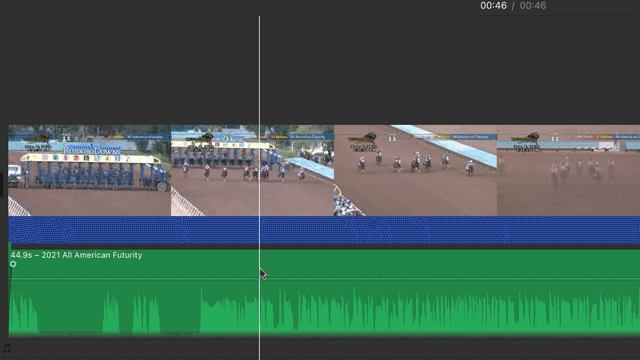
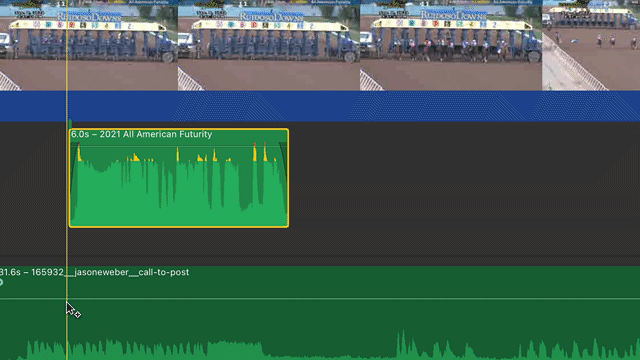
To trim a QuickTime video clip, open the video file in the QuickTime Player application.
- Go to Edit/Trim in QuickTime Player.

- Choose the area you want to save by dragging the yellow handles; the content highlighted in the yellow rectangle will be the clip that will be saved.

To fine-tune the start and stop, you can also use the left/right arrow keys to nudge the playhead left or right, then type “i” to move the starting point to the playhead’s position, or type “o” to make the ending point at the playhead’s position. As another option, you can click and hold on the yellow slider to get a zoomed in view of the playhead, and do more precise edits in that view.
- Save the edited movie.
Recording a Video of Your Mac Screen Using QuickTime
To record your Mac’s video display:
- Go to the QuickTime Player application.Choose File/New Screen Recording.

If you want to record audio (such as a voiceover) while you’re recording your screen, click on the small icon next to the record button, and select the appropriate Microphone source. Otherwise, audio recording won’t occur. - Choose if you want to record all your screen, or a portion of your screen (options are highlighted in red below), then click on the Record button.

- Click on the Options menu.

Choose the appropriate audio source, which should be your built-in microphone, unlesss you have an external usb microphone.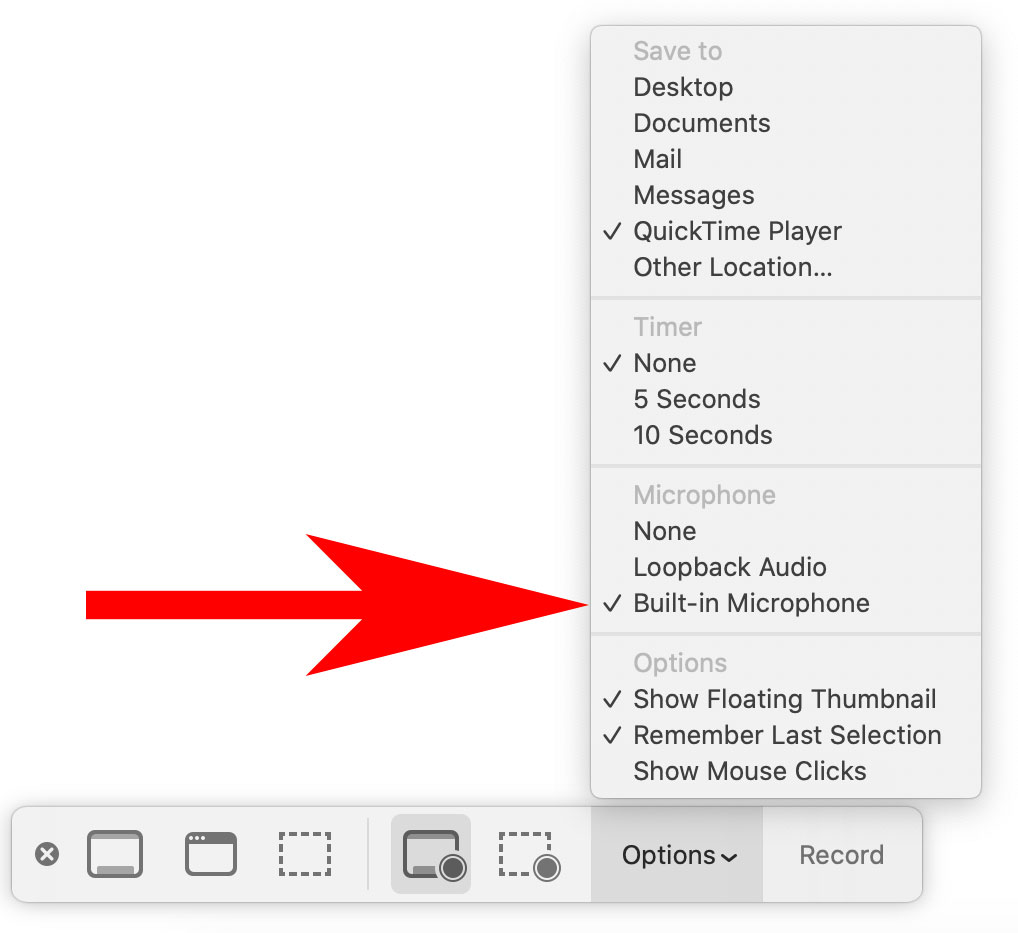
- Go to the application you want to record the screen activity.

After you’re done recording your screen:
- At the top of your screen (to the right of Finder menu items), click on the black square, which is the button to stop the QuickTime recording.
Save your video file. Trim the clip either in QuickTime Player or iMovie.
Quick tip: For any screen recording, remember that any motion on the screen will draw your viewer's attention. Minimize your mouse movements to only those necessary to draw the attention to an important part of the screen, or an action that needs to be taken.
Screen Capture and Screen Recording Quick Tips:
If recording your screen, clean up your desktop to have your viewer have less distractions, which will help them focus on your content.
- Try to minimize your mouse movements to only those movements that are important to capture.
- Temporarily put all your desktop items into one folder, ideally in a location away from the desktop.
- Temporarily make the desktop background image a solid color.
- Hide your dock.
- Choose full screen (if it’s available) with the application that you’re going to screencapture.
- If you’re recording a browser, close out any tabs that you won’t be using for your screencast or screen capture, and hide any bookmarks.
Note: This will record a video of your Mac's screen, but not audio that may be streaming on a web browser; to record both video and audio, please view this page.
Recording Your Mac’s Video Screen with Audio

This technique can be helpful when needing to record a video of your screen for educational purposes when media is being played back on a browser.
To record your Mac’s Screen with both audio and video:
- Install loopback audio (free extension).
- Open the media you want to screen capture in your application (if it’s a browser, use Firefox or Chrome, not Safari). Start at least 5 seconds before where you want to start – this will usually give time for the application to hide any playback controls which might be distracting. Don’t press play yet.
- Go to System Preferences/Sound. In the sound Output, choose Loopback Audio in the Output tab.

At this point, you will hear no sound from any of your Mac’s applications, but don’t worry. - Go to the QuickTime Player application; choose File/New Screen Recording.
- Choose if you want to record all your screen, or a portion of your screen (highlighted in red below), then click on the Record button.

- Click on the Options menu.
Choose the appropriate audio source, in this case Loopback Audio. - Go to the application that was set to play the video; press play (hopefully you queued up the video to play at least 5 seconds before the area you wanted to capture – this will usually give time for the application to hide any playback controls which might be distracting).
After you’re done recording:
- Stop the video in your application that was playing your video.
- At the top of your screen (to the right of Finder menu items), click on the black square, which is the button to stop the Quicktime recording.
Save your video file. - Go to System Preferences/Sound. In the sound Output, change the preference back to Internal Speakers (or whatever was your original choice). You should be able to hear sounds now from your speakers.
- Go to your saved movie in QuickTime Player, and test out the sound. Trim the clip either in QuickTime Player or iMovie.
Screen Capturing your Mac Computer Screen

You may need to take a screen capture (or screenshot or grab; different terms, same idea) of your Apple’s desktop or laptop’s screen. Apple has a screenshot page that lists this info. Here’s the two most basic and commonly-used commands.
Copy your entire screen
- Shift-Command-3
Screenshot of a portion of your screen
- Shift-Command-4; click and drag the crosshairs to isolate the content.
Note: If you're wanting to record your screen rather than take a screen capture, visit the "Recording a Video of Your Mac Screen Using QuickTime" help page.
Screen Capture and Screen Recording Quick Tips
If screen recording or screen capturing any part of your screen, clean up your desktop to have your viewer have less distractions, which will help them focus on your content.
- Temporarily put all your desktop items into one folder, ideally in a location away from the desktop.
- Temporarily make the desktop background image a solid color.
- Hide your dock.
- Choose full screen (if it’s available) with the application that you’re going to screencapture.
- If you’re recording a browser, close out any tabs that you won’t be using for your screencast or screen capture, and hide any bookmarks.
Multimedia Examples
There are many ways and techniques to tell a story visually, even if your subject may be a bit difficult to present visually. Here are a few samples that show how some people have creatively put together projects using a variety of different techniques:
- Using Timelinejs for a timeline-driven piece. While not a video-driven piece, this is a great tool for visualizing a timeline, and putting it onto a webpage. Plus, there’s no scripting involved beyond copying-pasting the embed code into your webpage. Loads of great examples for inspiration.
- Screencapture. I’m using this term to describe taking static shots of your Mac’s computer screen, rather than recording motion on your Mac’s screen. You can take a screenshot of your entire screen, or just a portion of your screen, or a screenshot of a window. Read these mac screencapture tips to do all these things.
- Screencast. Record your screen while you are showing something visually with your mouse, writing on the screen, annotating a written piece, or recording a slideshow while you are doing a voiceover. Be sure to check out the article on screencasting tips too!)
Example: Area of a Composite Figure.
- Animate still photos. This helps to create a “living image”
Example: Funny frog. This video was created from a still image. Note the music used to further enhance the video.
- Ken Burns effect. You can zoom about an image to focus the viewer on a specific part of an image. This is perhaps one of the easiest ways to draw a viewer into your topic.
Example: Ken Burns Effect
- Timelapse. Record a timelapse video of your topic.
Example: What if the World Went Vegetarian. Fun video shot on a whiteboard.
- Animation. You can create animation, or use software to aid you, to create something visually that will help to tell the story.
Example: Troy Library. Uses software animation to present the topic.
Example: Animated Life: Pangea. Uses old animation techniques to bring the story to life.
- Interview someone. Have someone tell their story, or combine interviews to tell a story. Make sure you are recording them properly, with a good microphone and in a quiet environment. Be sure to read the interview tips on this page too!
- Record yourself. Only for those brave enough to stand in front of the camera, but you can record your discussion of your thesis (with fun visuals), like this fellow here:
The Editing Process
First round(s) of editing
- Give a brief statement on the project. Questions to ask yourself: What is the topic of the project? Can it be explained in 1-3 sentences?
- Is there a time limit to the project? If so, time out the project with a voiceover; diagram out themes. If timing is within the project parameters, go to #7.
- Listen for any redundant/slang/awkward statements.
- Show, don’t tell.
- Look for too many examples that show a topic, or if the sequence is too long to explain a topic, and loses the viewer’s interest.
- Go back to #2 – how’s the time now? Too long? Repeat steps 4-6 🙂
- Work on visuals (use a Ken Burns effect, or use other media).
More Editing Tips and Tricks!
Voiceover tips
Think of voiceover as reading a poem (i.e., “expressive reading”):
- Give pause to statements and commas/periods.
- Give inflection to voice, rise with a question, drop with a statement.
- Place emphasis on keywords or phrases in the text.
Transitions
Many people’s go-to transition is a cross dissolves. Use jump cuts as well, such as at the end of a sentence or statement, or “on the beat”, such as when a note is struck in the music, or a word is spoken in the narrative.
Cues for a new chapter/idea/section
These are just possible cues to help the viewer change to a new topic – there’s always more to discover. And experiment with using a few together.
Audio
- Music cues – change music to different tone/instrument.
- Lack of sound – end on strong statement, give 1 second pause.
- Long strum of guitar can indicate an ending or a beginning (ken’s at 1:36).
Visual
- Fade to black.
- Hold on still image for 1 second.
- Titles can indicate new chapter.
Titles
- Keep titles short, and have them display long enough to read out loud; try to not have voiceover or motion during this time.
End credits
- Don’t use bold.
- Use italics for books, magazines, etc.
- Call to action on its own slide at the end of the credits, such as a website url.
Possible editing workflow
- Focus on tightening up the edit (edit down to the approximate time allotted for the project, if there is one).
- Work on finalizing composition of images. Break up shots; don’t use Ken Burns every time, try to use other media or clips..
- Work on transitions between scenes.
- Adjust volume levels (make sure all voices are at same levels, have quick fade up/down at beginning/end of audio clip as needed, sound duck music when voice over occurs).
- Work on pacing. Give pause between different sections or topics; can break it up with titles to indicate new topics, use fades, use a different soundtrack, raise the volume of the soundtrack, etc.
- Perform any color correction, if needed.
Using iMovie
Here’s a brief video that covers how to start a project, import footage, do a quick trim, then export the movie.
iMovie in depth
- iMovie interface
- Organizing your media
- Importing your media
- Editing your media
- Exporting your media
- iMovie keyboard shortcuts
- iMovie online tutorials
iMovie interface
iMovie is organized into 3 thematic areas, generally found at the top of the screen unless you have already opened up a project:
- Media: Where you store your content; may have different libraries that contain different media.
- Projects: A collection of your edited projects. Sometimes it’s useful to duplicate a project here if you’re doing a different edit on a project. When you create a new project, you’ll be prompted to choose either a Movie or Trailer project; choose Movie.
- Theater: View movies you have exported/shared, or create a new movie or trailer here as well.
Generally, iMovie opens your last edited project. If you haven’t created a project, create one by choosing File/New Movie. iMovie will then bring you into the project view for your new project. In this project view, iMovie is broken up into 3 distinct areas.
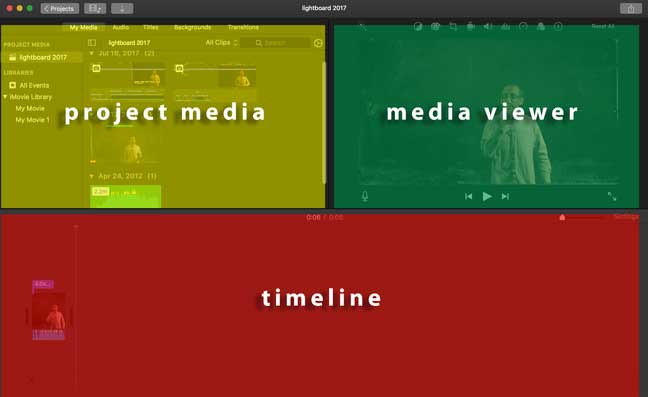
- Project Media. On the left side of your screen is the media for your project. This will include your collection of media that you may have imported, as well as quick views into your iPhoto library, and any music from your iTunes library and GarageBand. iMovie arranges media into libraries, which you can find here. You can also find titles, backgrounds, and transitions in this area.
- Media Viewer. On the right side is a media viewing area of either the media in your timeline, or media you have selected in your project media area. The media viewer has a number of color- and audio-correction options above it, so you can perform adjustments to color, crop an image, apply a Ken Burns effect on a media clip, and a number of other helpful editing options.
- Timeline. The bottom is your timeline of edited media; you can trim video clips in the timeline as well as adjust audio.
Organizing your media
Generally you should create a new library for your project, as otherwise you may eventually have several project’s media in your main iMovie Library. This can become rather cumbersome to sift through several years of different project’s media.
Within your iMovie library, media is organized into events, which are organized by date. Quick screensaving real estate tip: You can hide the events names by unclicking the “Show Separate Days in Events” in the View menu.
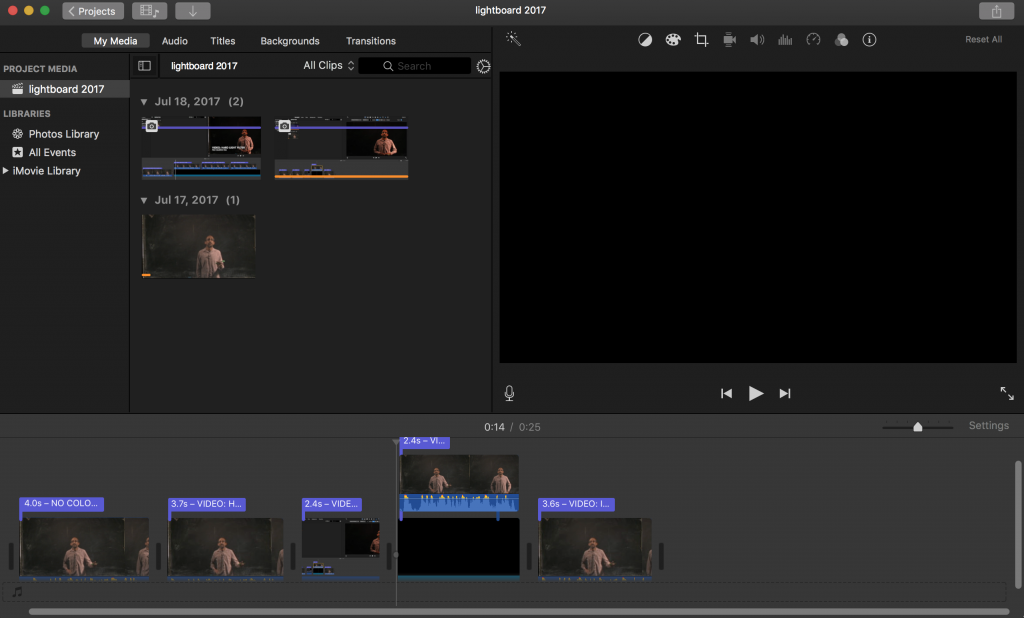
While reviewing video clips, you may find a good section within the clip. You can favorite that portion of the clip by choosing Mark/Favorite, or hitting the F keyboard shortcut. Inversely, if you find a bad section within a clip, you can reject that portion of the clip by choosing Mark/Delete, or hitting the delete button on your keyboard. Later, you can sort your media by looking at only the clips you’ve favorited, which can be helpful when sifting through dozens of clips.
Importing your media into iMovie
Generally you can drag-and-drop your media from anywhere on your computer onto your project’s timeline, and the media will get copied to your iMovie project library.
Importing your media from the Photos app
You may have imported video or photos into the Photos app. You can easily add these into your project by these steps:
- To import videos, click on Photos Library in the Project Media section, under Libraries, and choose the My Media tab. Select your content in a variety of ways; one way is to select Albums, then select Videos. Drag the video onto your project’s timeline.
- To import photos, click on the Photos Library, and select the My Media tab. Select your content in a variety of ways; one way is to select Years, then locate your photo(s) to import, and drag them onto your project’s timeline.
Editing your media
iMovie has several tools to edit your video; here are a few of the more common ones to use.
Video overlay tool
There are a few ways that iMovie can displays videos or images that are stacked on top of each other in a timeline. These changes are found in the Video Overlay settings, located above the main viewing screen of your footage when you have selected a video or image on the top layer. For convenience sake, we will refer to the format as video, but images can apply here as well. The image below shows the location of the video overlay tool, with Cutaway selected.
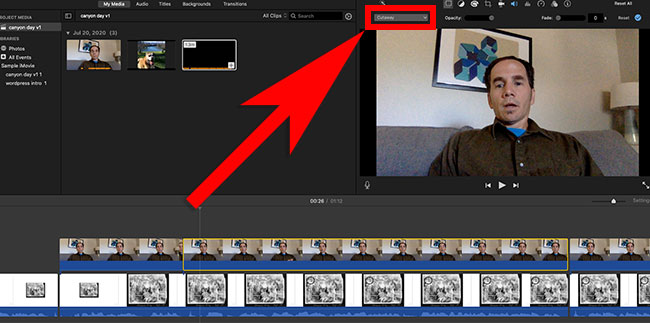
The cutaway. The default format for displaying two videos that are on top of each other is the cutaway, which takes the top video and covers the entire frame, hiding the bottom frame.
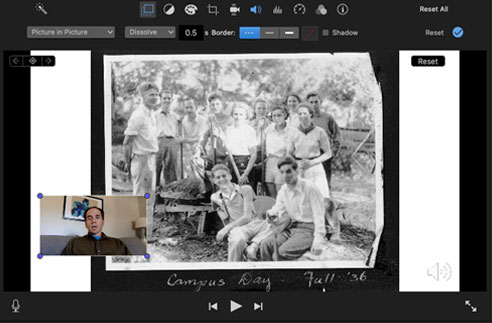
Picture-in-picture. You can change the video overlay to show a picture-in-picture. You can also move the top video around in the frame, as well as resize it. The image below shows the video overlay tool, with the picture-in-picture tool in use. Note how the smaller video image can be resized and moved about.
Trimming your media
With a clip in your timeline, hover over the beginning or end of the clip until the trim tool appears. Click and drag to either remove the beginning or ending portion of your clip.
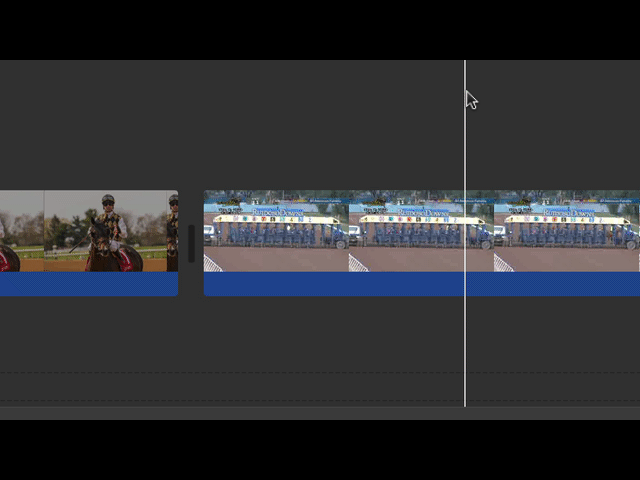
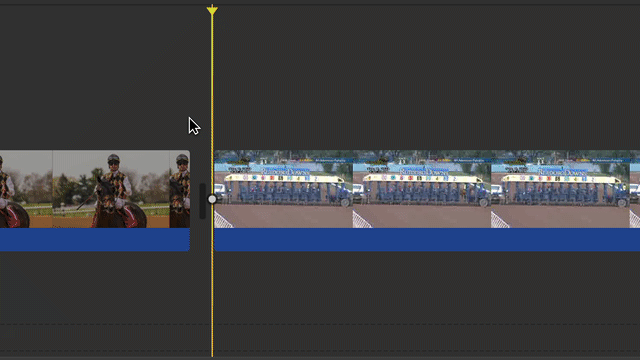
Splitting your media clip
In the timeline, position the playhead where you would like to split a media clip. Go up to the Modify menu item, and choose “Split Clip” from the options. Trim the clips further as needed.
Animating media
You can animate media by zooming in/out of an image by choosing the Ken Burns effect. This is found by selecting the Cropping tool in the Media Viewer when the media is selected.

You can choose when the image start and end sizes from this view. Additionally, you can apply this effect to movies, though the zoomed movie may become “fuzzy” depending on your export settings.
Detaching audio from your video
With a video clip in your timeline selected, right-click the video and choose the “Detach Audio” selection. If the video portion is not needed, move the audio to a separate area in your timeline (so that it is no longer connected to the source video) and delete the video portion of the clip.
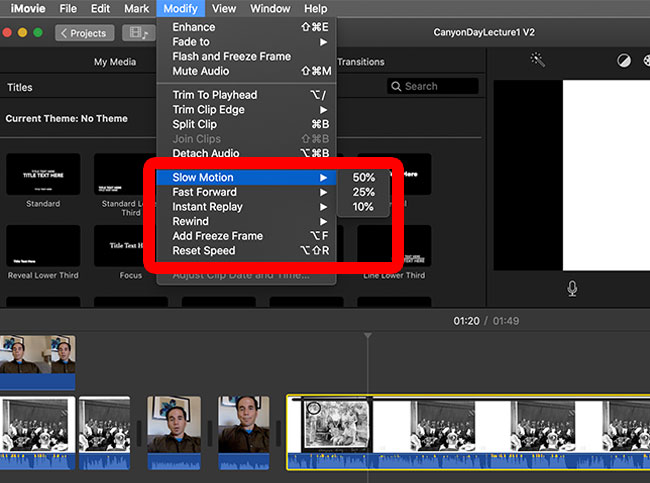
Speed controls for your media
You can slow, speed up, or freeze a portion of your movie, among other actions. These controls can be accessed in two ways. You can either choose the top menu item Modify, then choose the appropriate control (slow motion, fast forward, add freeze frame, etc), indicated by the rectangle highlighted below.
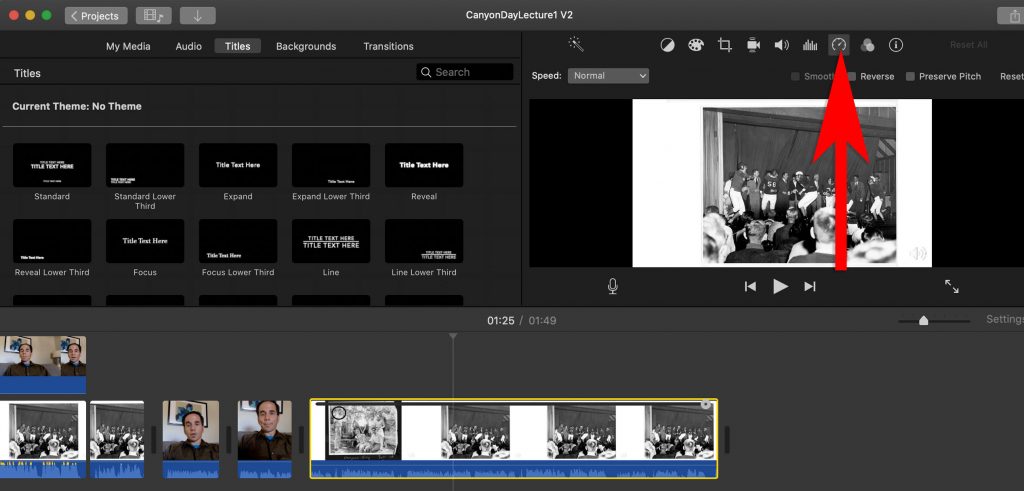
Or. you can choose the Speed tool in the media viewer’s toolbar, indicated by the arrow in the image below.
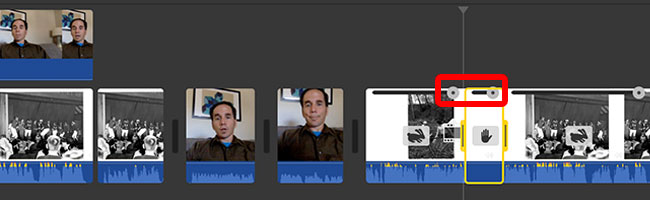
To use the freeze frame tool, select your clip then choose the freeze frame option. The freeze frame will be noted in your timeline with the hand icon, indicated below.
Using the Freeze Frame tool
You can then adjust the freeze frame duration by dragging on the left or right dot, indicated by the red rectangle in the image below. Dragging the right button icon to the right would increase the duration of the freeze frame.
Editing a lecture using iMovie with Zoom and Powerpoint footage
View this page for tips on editing your zoom/powerpoint footage in imovie.
Adjusting audio levels
To adjust audio levels, roll over the video clip, and click-and-drag on the audio waveform to make the volume louder or quieter.
To reduce the abrupt clipping of audio when it begins or ends, go to the beginning or end of an audio clip and drag on the fader icon, which is a small circle, to minimize the sound being introduced or removed abruptly.
Soundducking
To soundduck an audio track (to lower the volume of one audio source so another audio source is heard more clearly), option-click on the area where you want to start lowering the volume, which will create a keyframe, or marker where a change will be taking place. Do another option-click just to the right of the audio to set another keyframe. Then, move to the area you want to raise the volume, and create two new keyframes. Adjust the keyframes and the volume as needed.
An easier way to sound duck is to press the “r” key, and click-and-drag over the area you would like to adjust. When you release the mouse button and the “r” key (which is short for “range”), you will have 4 keyframes added for you already. Adjust the keyframes and clip volume as needed.
Color correction tools
iMovie has several color correction tools. The first one is the magic wand tool, which sometimes is able to do an adequate job of color correction. Select your clip, then click on the magic wand tool.
For more color adjustment, you can use the color correction tool. Select the clip, then move the sliders to adjust the highlights, midtones, and shadow areas of the video or image.
Exporting (aka sharing) your movies
Export your edited movie by clicking on the share icon on the top right of the iMovie interface.

Or, you can choose File/Share, and choose the File option.
- Video resolution: Choose the largest size available if this is your final project.
- Quality: Choose High
- Compression speed: Choose Better Quality.
After making these options, the File/Share dialog box will also give you a sense of how long the video will take to export, as well as the estimated file size.
Sending movie files to share with others
If sharing files for a course, read these instructions on using Reed’s Panopto media server to share your content.
Movie files tend to be too large to email. We recommend using a Reed application called Filerobot, which allows sending of large files (up to 2 GB). Read more about Filerobot.
Moving your project or media between computers
iMovie stores all its projects by default into the username/Movies directory on your mac’s hard drive as a file aptly named “iMovie Library.” This file contains all your media in one place. As you grow your movie projects, you may want to start breaking them up into smaller projects or libraries.
- If you need to move your project or library to an external hard drive, follow these instructions.
- If you need to move media between libraries, follow these instructions.
iMovie Keyboard shortcuts
Here’s a few iMovie keyboard shortcuts that you might find useful:
- Command-C and Command-V: Copy and paste clips.
- Space bar: Plays or stops media in the timeline or event selected.
- Split clip into two: Command-B: One of the most common tasks in iMovie is splitting a clip into two clips where the playhead is located.
Arrow keys: Sometimes you want to nudge the playhead left or right. The left- and right-arrow keys are the ones to use, rather than trying to use your mouse. Using the up-arrow key will take you to the beginning of the clip your playhead is on, then the end of any preceding clips or transitions; down-arrow will take you to the end of the clip, then the start of the next clip or transition in the timeline.
iMovie online tutorials
Apple has an extensive amount of documentation on using iMovie. There’s these tutorials as well.
- Tutorial 1
- Tutorial 2 Talks briefly about the whole process: storyboard, production, editing. Also covers most of the common editing tasks such as adding titles, transitions, backgrounds, performing color correction, cropping images, and more.