- The GarageBand interface
- Setting up your first project
- Recording in GarageBand
- Editing
- Exporting your track
The GarageBand interface
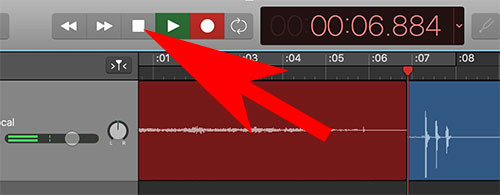
The Transport controls can stop/start your audio in your timeline, forward and rewind, take you to the beginning of your project, among other tools

Master volume control
The master volume slider will increase/decrease the volume of your entire project. Ideally you want to have the audio’s loudest regions in the yellow regions, but not in the red.

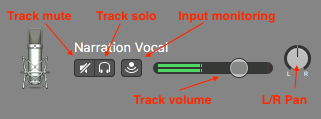
Track controls
Each track has individual controls to mute (make that track silent), solo (make all other tracks silent), as well a volume meter to view how loud the track is, and a volume slider to increase/decrease the loudness of an individual track.
Each audio track recording has a waveform, which is a visual representation of the audio. As your audio plays back, both the individual and master track volume meters will indicate how loud or quiet the audio is in your project.
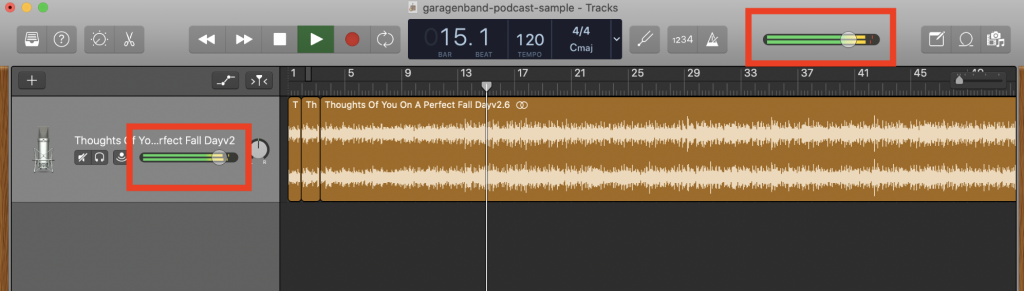
Ideally you want to have the audio’s loudest regions (indicated by larger spikes in the waveform) in the higher green to yellow regions, but not in the red. Adjust the individual track volume slider so that most of the audio played back is in the higher green to yellow region, but not go into the red.
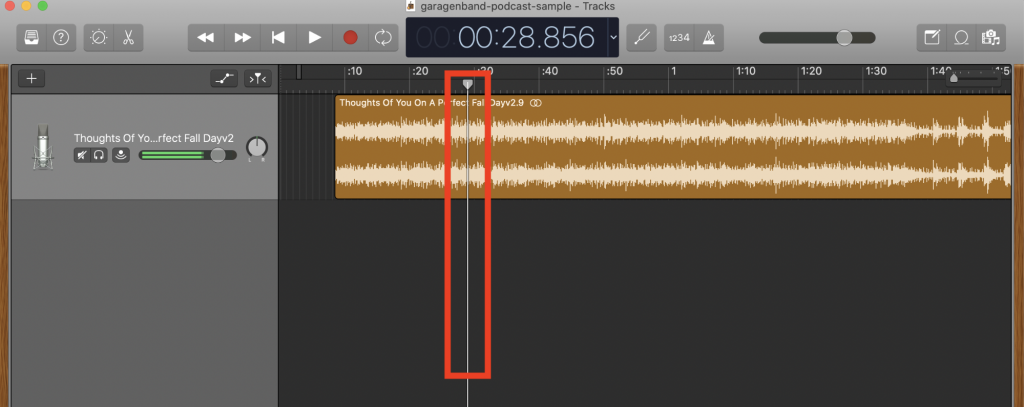
Audio playback
The playhead (the downward facing triangle connected to a vertical line) indicates where in your project the playback will start.
Timeline navigation
To zoom in and out of your timeline, click and drag on the zoom icon.
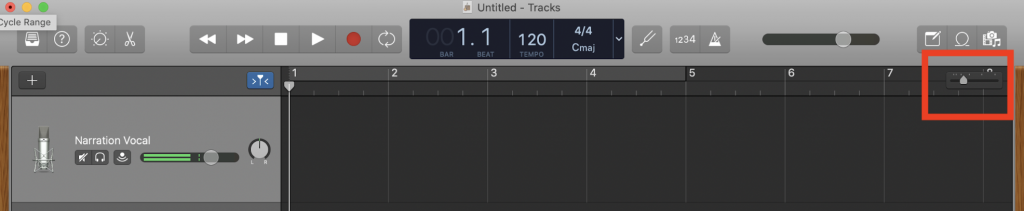
Track Playback
Setting up your first project
These instructions are for setting up a project for a podcast.
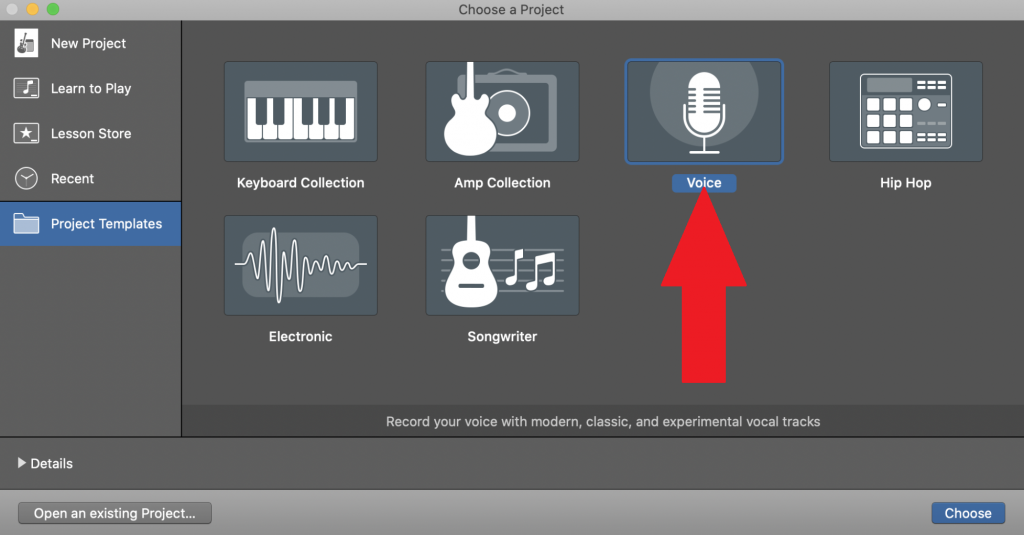
- Launch Garageband; a template window will open. Click on Project Templates, then choose Voice.
2. GarageBand will open up a new project similar to the screenshot below.
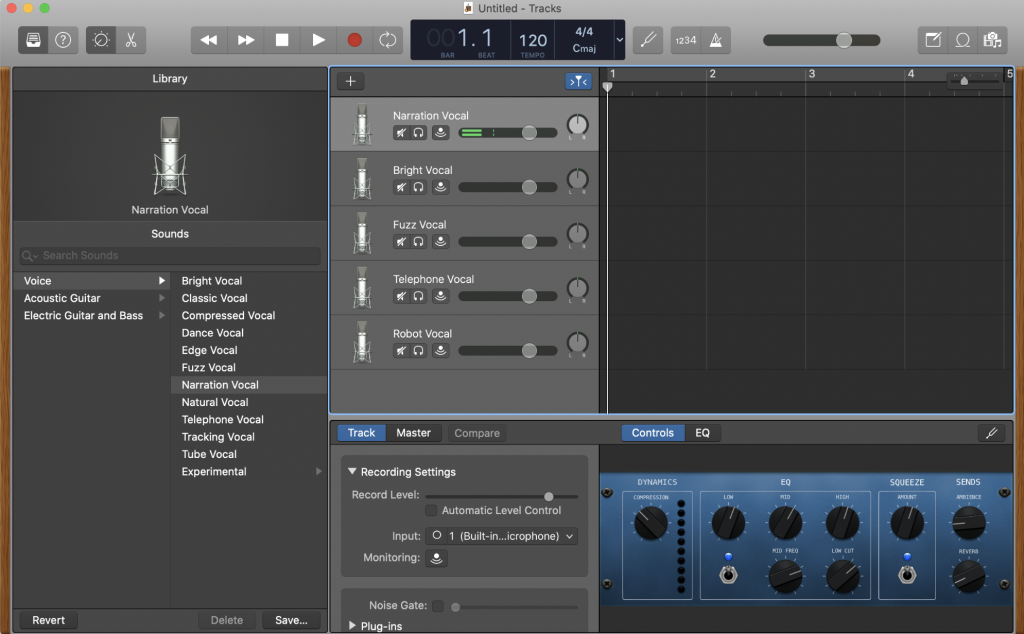
Close down several windows to focus on the main editing timeline. Choose View/Hide Library and View/Hide Smart Controls.
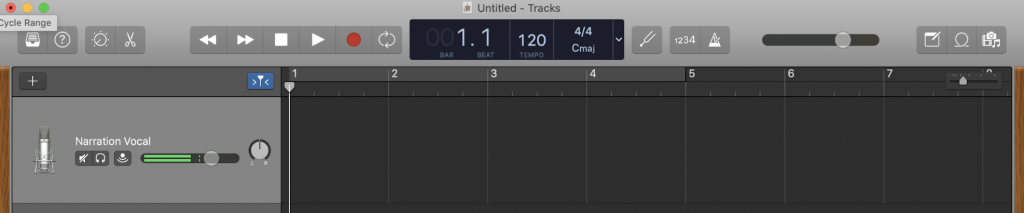
Each horizontal row is an audio track. Select the Bright Vocal, Fuzz Vocal, Telephone Voice, and Robot Vocal tracks, and hit the delete button. Your project should now look similar to the screenshot below.
3. Save and name your project. The default location will be in username/Music> GarageBand/; save to another location, if desired.
4. Drag a pre-recorded audio track (audio mp3, aiff, or wav file) onto this track.
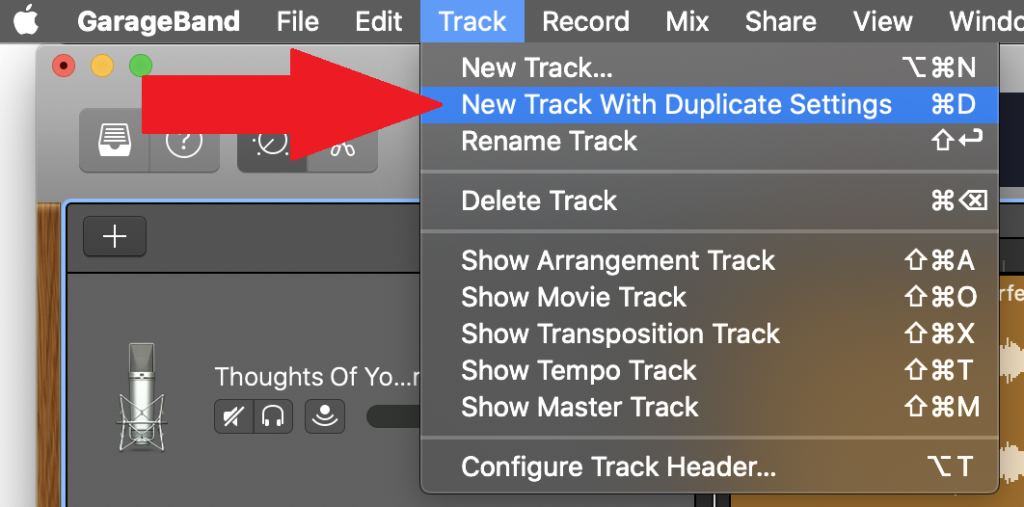
If there are additional audio tracks, create a new audio track by going to Track/New Track with Duplicate Settings (command-d keyboard shortcut), then drag the audio track to the new track(s) you created.
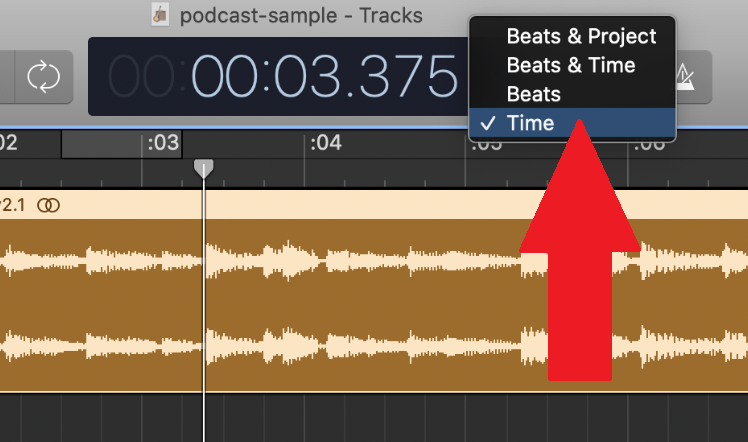
5. Set your time view from Beats and Project to Time, which will give you an hour-minute-second view of your project.
Recording in GarageBand
After Setting up your First Project, you will want to review recording tips for the best possible recording, check your microphone settings, then start your recording in GarageBand.
Recording tips
- Record in a quiet environment. Be aware of any external noises in your recording environment, and try to remove or reduce them.
- Keep your microphone in the same spot for the entire recording process.
- Keep yourself about 1-2’ from mic, with the microphone angled slightly away from your mouth.
- Use a pop filter or windscreen, if you have one.
- Headphones are a must so you can hear your levels, and avoid feedback. You can check out headphones at the PARC.
Check your microphone settings
You can use your internal microphone built-in to your computer, but it is recommended to use a USB microphone or an audio headset for any audio recordings; some are available at the PARC for checkout, or you can contact ITS@reed.edu for a short term loan if equipment is available.
Note: If you are using a USB microphone, go to GarageBand’s preferences and click on the Audio/Midi tab. Make sure your input device appears as your microphone, if it doesn’t show up, you may need to quit GarageBand, unplug and replug the microphone in, then restart GarageBand.
Access the Smart Controls panel
Either click on View/Show Smart Controls, use the keyboard shortcut B, or click on the Smart Controls at the top right of the GarageBand interface to access the Smart Controls panel. On the left is Recording Settings.
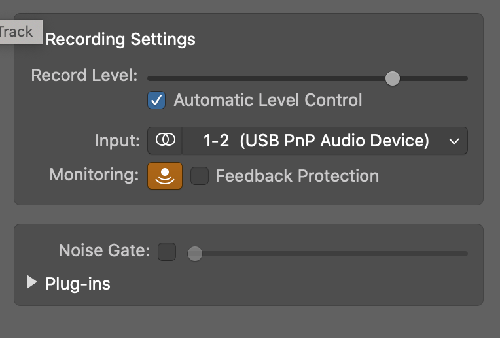
- Turn on Automatic Level Control, which will adjust your audio if it’s too loud or quiet.
- Turn on Monitoring if you have headphones, and want to hear yourself as your audio signal as you record.
- Turn on Feedback Protection if you aren’t using headphones.
Start your recording
- Select the track you want to record on.
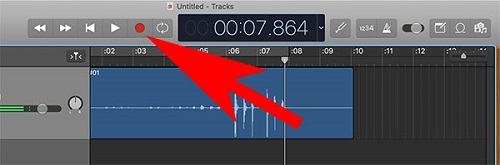
- Position your playhead where you would like to start recording. By default this will be the beginning of your recording, but after a few recordings, it may be in a different part of your timeline.
- Click the red Record button to begin recording
4. Click the Stop button to finish recording.
Edit your recording
Headphones are a must when editing so you can hear the audio clearly. You can check out headphones at the PARC.
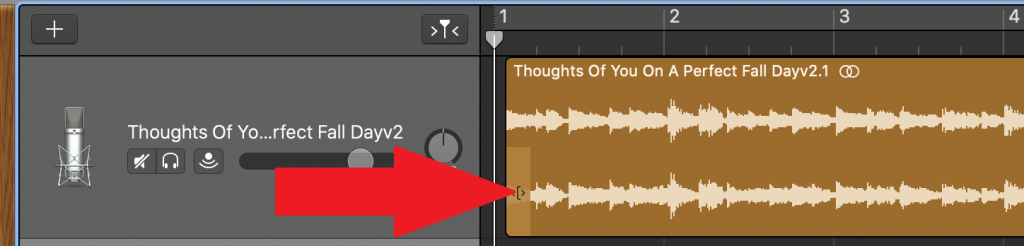
Trimming a clip
You may want to remove the beginning or end of an audio clip. Trim your clip’s beginning or end by going to the beginning or end of a track; your cursor will change to a bracket icon. Drag the audio to the desired area to trim.
Splitting a Clip
To split a clip in the middle, move the playhead to where you want to split a clip. Choose Edit/Split regions at Playhead, or use the command-t keyboard shortcut.
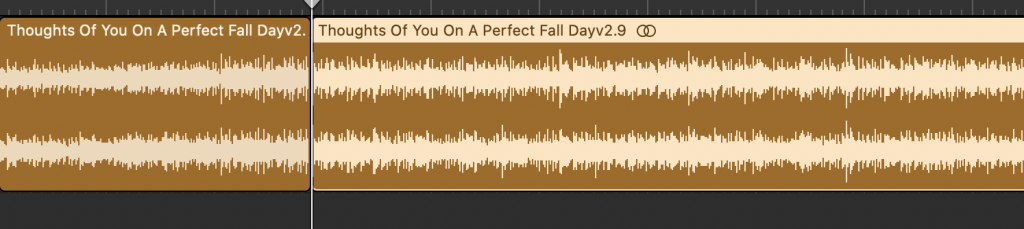
Presplit clip:
Split clip:
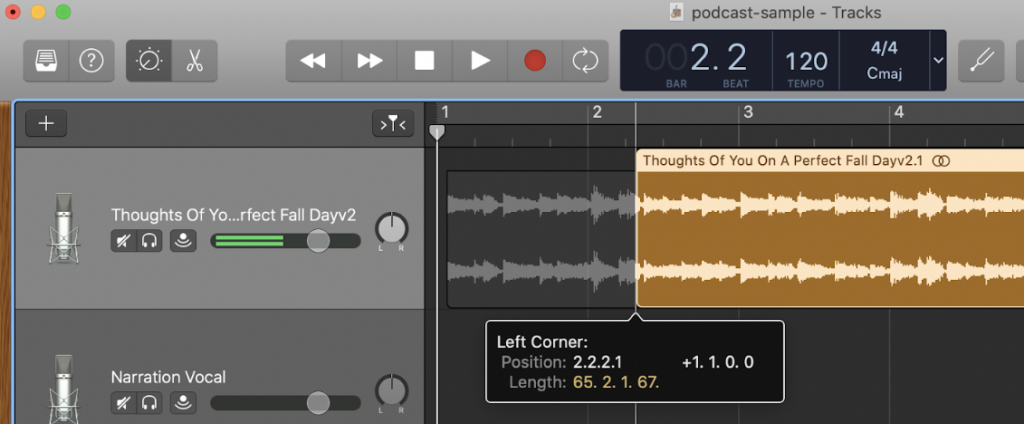
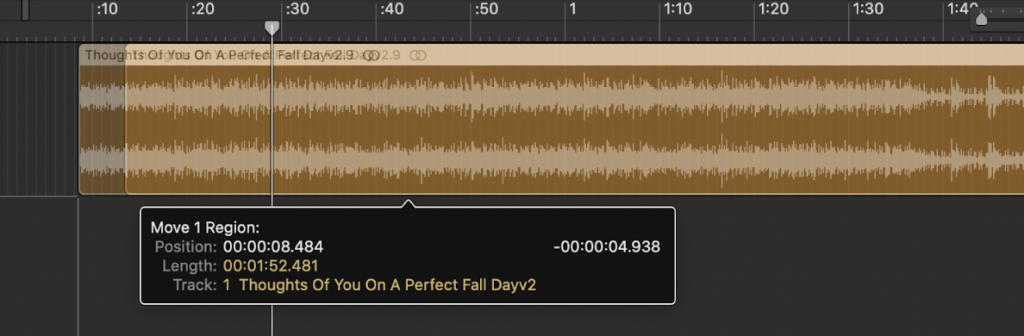
Moving a clip
To move a clip, select it and drag it to its new location.
Fade in/out the volume of an audio clip
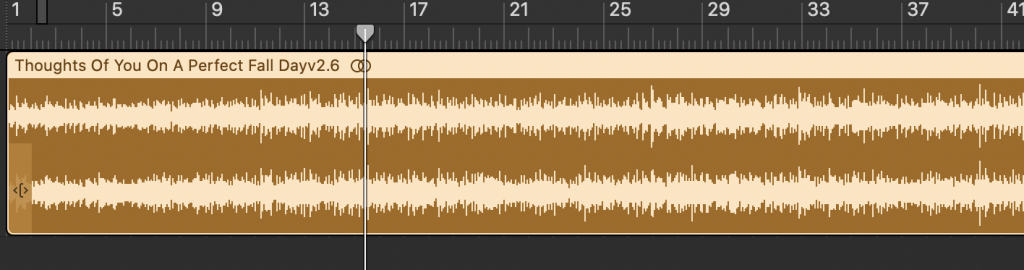
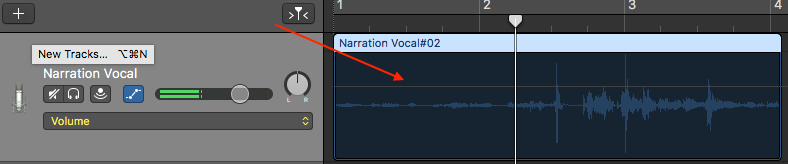
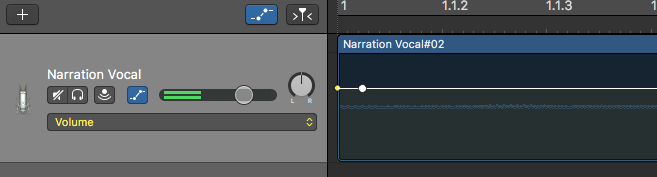
Most times you will want to fade-in or fade-out the audio’s volume, to avoid any abrupt audio transitions. To do so, turn on automation; go to Mix/Show Automation, or press the “A” keyboard shortcut.
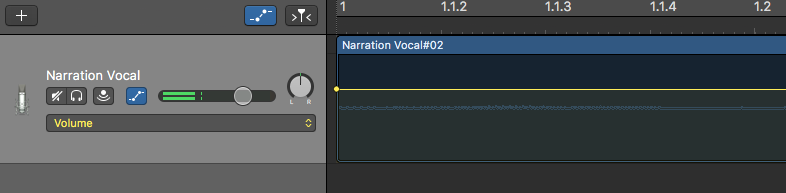
Your track will now look like this; volume is the default view (indicated by the dropdown menu). The faint horizontal line running above the waveform represents the current volume level of the track.
Fading in audio
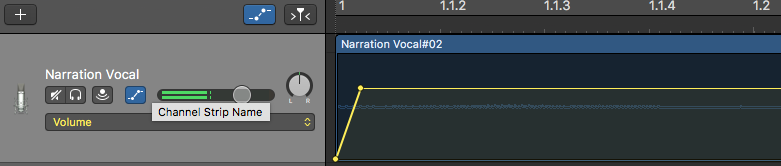
Click on the line so it turns yellow; click at the beginning of the track to set a control dot.
Click a little farther down the line to place a second control dot.
Drag the first control dot all the way down. This will start the volume from zero (inaudible) to the volume you have set in the second dot.
Press A to turn automation off.
Fading out audio
Reverse the above process to fade an audio track out; keep the first dot at the original sound volume, and drag the second dot to the bottom.
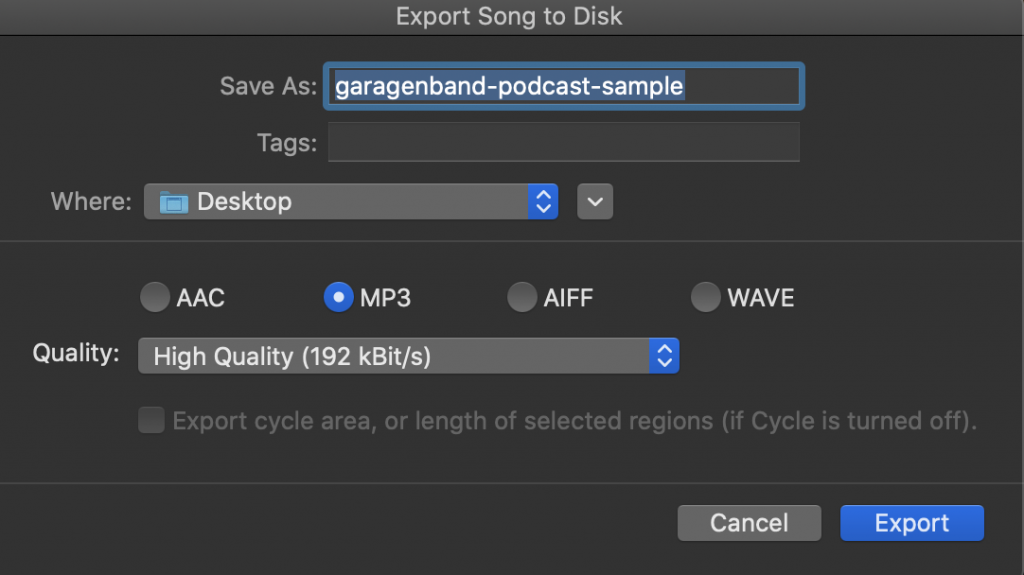
Exporting your track
Go to the Share/Export Song to Disk. Select Mp3 and High Quality (192 kBit/s). Click on the Export button.