
Part one’s project created a replica of a Chinese woodblock, in this case a woodblock from the 1970s that was in fairly good shape (at 40 years old!); the woodblock itself was intact, and the wood carving still had pretty crisp lines for printing. We were able to successfully create a new block from the previous artwork in a fairly straightforward manner.
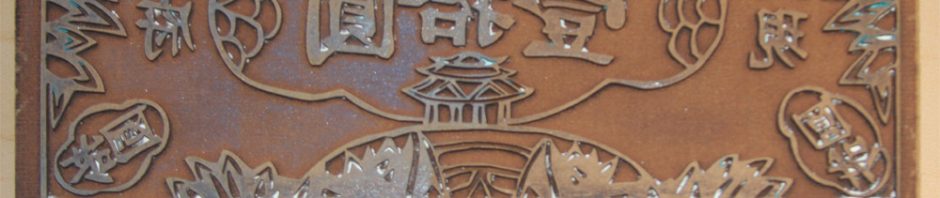
The next woodblock that we were looking at was more problematic. Reed College religion professor Ken Brashier, owner of both woodblocks, estimated that this two-sided woodblock depicting artwork from the Chinese Hell Scrolls, was from the 19th century. This older woodblock was in considerably worse shape than the previous woodblock – there were cracks in the woodblock, and the artwork, after many decades, had been worn down, or was completely deteriorated in some places. Trying to create a reproduction of this artwork would be considerably more problematic.

Facing the same issues of the previous block, we were unable to simply scan it in, as all the surfaces were black. 3d scanning was a possibility, though the cost was estimated to be rather high. As this was still an experiment, we were hesitant to take this costly approach. So, we decided to carefully make a print from the existing block, after getting approval from Brashier. After printing, would go through the same process: scan the print, clean it up in Adobe Photoshop, then have a new print block made of the resulting artwork.
There was concerns of using the same water-based paint, as it could potentially damage the over-100 year old wood. So, with the help of the kind guidance of Reed College’s Art Department, we made one print of both sides of the wood block using a oil-based ink, while taking great care not to further damage the fragile centuries-old woodblock.
We made several prints of the blocks. Unfortunately, the prints did not turn out well, reflecting the deterioration of the artwork, as well as the novice printmaker (yours truly).

We then scanned in one of the prints, and, in Adobe Photoshop, added a photo of the original print on another layer, to get reference to what the original artwork looked like. Then, with the aid of a tablet and a lot of patience from our student worker, each line of artwork was cleaned up. In some deteriorated areas of the artwork, lines were redrawn where it had been clear there were lines previously.

As in part one of this laser cutting project, the artwork was inverted, as the areas in black needed to be cut out from the linoleum block. Using the settings from the previous project, a new woodblock was created from the cleaned-up artwork in photoshop. Finally, several prints were made of the restored artwork, which can allow others to examine the artwork for the first time.
