Say you need to make a video for a class, a short rough of a performance idea for a theatre project, some dance choreography, a video capture to be used in a multimedia project you move into software on the PARC computers, a music video of your band, or even a feature length film. Why not consider using an iPad? It is quick and easy. As mentioned in my previous blog post the iPad’s processing power is approaching laptop speeds and with the iPad Air 2, they are closer than ever.
This post will cover video capture on the iPad as a fully contained start to finish video workstation replete with some amazing vintage video effects! There are many times when new creative workflows are desired for inspiration and/or the aforementioned processing power and real estate of screen size isn’t needed. In those situations a very portable or auxiliary video capture station is a good choice: enter the iPad (applause). This may not be viable for everyone, especially people needing to do heavy rendering requiring more processing power, multiple screens, and the picture quality a dedicated camera offers, but if that isn’t scenario try the iPad.
The iPad is is a joy to work with for video capture; it is lightweight and portable and the modern touch paradigm creates an onscreen control and monitoring surface for video creation and editing that is unique to the iPad. Sure, laptops are fairly lightweight now and can capture video, but that is rather awkward as the captured video is flipped due to the lack of an outward facing camera (insert added step of re-flipping the captured image in software). On the iPad, the camera and monitoring surface is all in one, and the camera has continued to get better with each new iPad version. So much so, that it is being used more and more for large screen film projects.
My current favorite video app is MoviePro, a video capture app with many professional-grade features. The app has manual/auto and lock settings for focus, AWB and ISO. Depth of field decisions are now more in your control than ever before. In addition you can control the zoom speed and add many other things including video stabilization (attempting to minimize the handheld shake and screen touching jiggles). It can record up to 3K (about 3ooo pixel across-screen resolution), with many other different resolution choices and the ability to adjust frame rates. You have the option of adding an external mic, and headphones for monitoring sound. With the ability to view the audio meter levels on the iPad screen, you can monitor your audio capture as you shoot so you don’t peak and cause distortion. In MoviePro, as in iMovie, you can trim/split your video selections. It is all non-destructive, hence your master clip stays untouched as a new one is generated when you render a trim change.
Here is a review that takes a comprehensive look at Movie Pro’s features and ability to output to Final Cut Pro X.
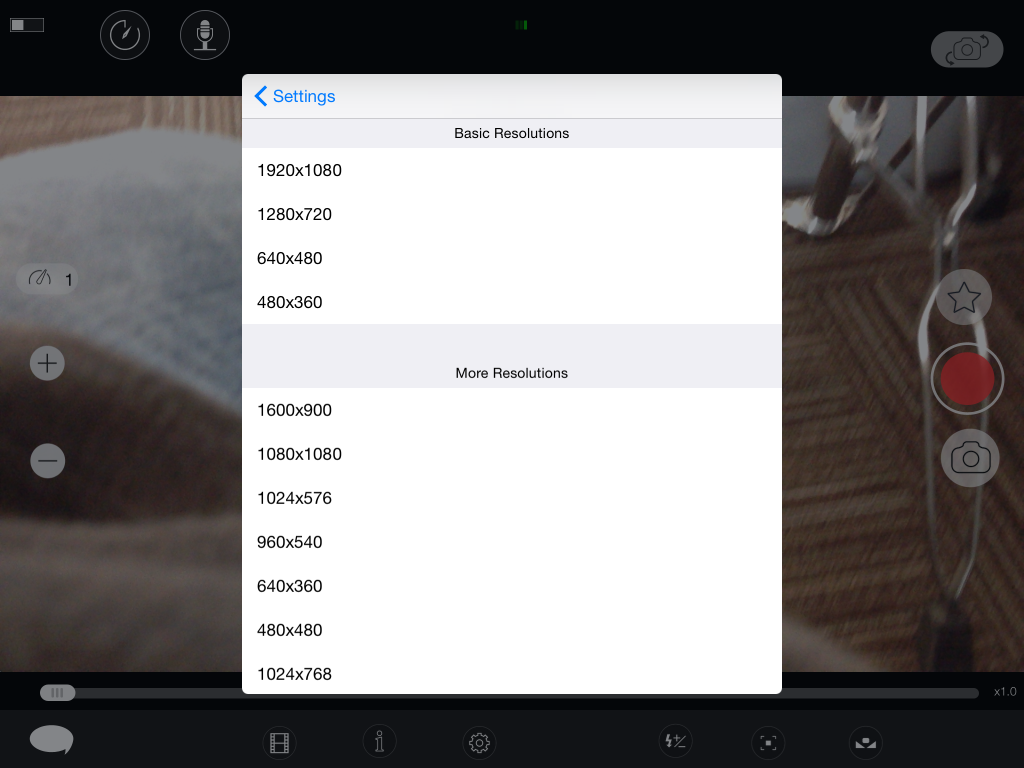
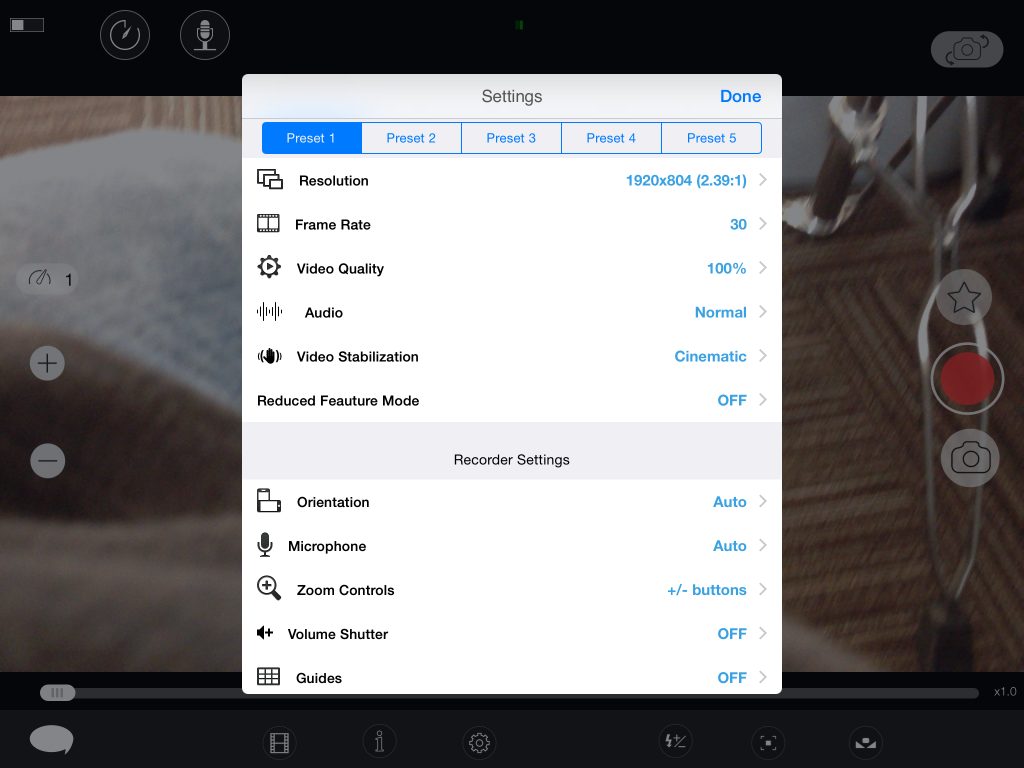
Below are some screen shots of the resolution output and other settings available for tweaking. My screen resolution in the example is set to a widescreen 2:39:1 aspect ratio, modern movie screen size.
My current workflow (if I want to stay on the iPad) is to go from MoviePro into iMovie (and build a more elaborate video involving detaching or adding audio tracks, still images, fades, slow motion and speeding up, EFX, and adding titles) and export it from there.
HINT: Do less zooming on the iPad if you can. Mobile technology camera zoom utilizes software interpolation rather than actual optical zoom (physical lenses). It has come a remarkable distance in a short period of time, and is quite good as of right now, but still if you need to zoom, and can do so take a note on the shot and do it in Final Cut Pro X, after the fact.
Of course you can also capture video in iMovie for iPad or use standard video capture on the iPad camera app, but you miss out on all the customizable professional settings MoviePro provides. You also introduce other workflow steps like picking a project or a trailer in iMovie. In effect, iMovie really functions as my iPad editing station these days.
Finally there is another app called 8mm that is extraordinary in what it does: it captures and mimics different types of 8mm film. A capture from it was used in the Oscar-nominated documentary “Searching for Sugar Man” on an iDevice. In the app have choices of lens type, style of 8mm (1020’s, 70’s, Siena and more) and frame jitter. This is a nifty little app and quite inspiring.
Below is a video I made using the 1920s selection in 8mm with some manual film jittering EFX (see below for example). I did this all via Reed’s wireless network while walking around outside of Commons. After filming, I uploaded my file via File Robot; there are many wireless ways to export from the iPad. (The file upload and download took under two minutes total.)
Here is another done by Lana DelRay using the 70s effect.
In addition all clips can be exported from the iPad through each apps dedicated “share” functions or through a cloud service like File Robot, DropBox or Drive. Likewise, if you own the iPad you can connect through the file share in iTunes when tethered to your computer.
If you want to maintain highest resolution that you can capture in MoviePro and want to do further editing you must go to a computer as iMovie on the iPad cannot handle anything above 1920×1080. You can then move to Final Cut Pro X, iMovie (desktop version) or multimedia software like Isadora and Max for further work at maximum resolution. Most of these apps and all the computer software mentioned exist at the PARC.
As always, come by the PARC and I would be happy to assist you.
Best,
Joe Janiga


